Category Archives: Health / Wellness

Hair Loss Support

This entry was posted in Health / Wellness on by .

We are seeing an increasing number of patients who are struggling with hair loss in the clinic. Chinese Medicine has been treating hair loss in men and women for thousands of years. It can help stop or slow further hair loss and also support regrowth.

Chinese Medicine View of Hair Loss

In Chinese Medicine, healthy hair is dependent on abundant flow of blood and Qi. It is said in the old Chinese texts that hair is the surplus of Blood. When there is a deficiency of either Qi or Blood (more often blood) or stagnation of Qi or Blood, the hair follicles aren’t able to receive the nourishment they need to grow healthy hair. Typically, blood and Qi deficiencies are caused by poor diet or digestive issues which prevent proper absorption of nutrients. Qi and Blood stagnation are often caused by stress or hormone imbalances (very common in perimenopause).

Girl turning head with hair flying in the air surrounded by trees

📸 : @steinportraits

Acupuncture improves the flow of Qi and Blood to the scalp and body to improve hair growth. Chinese herbs are often used to nourish the blood and Qi to prevent excess hair shedding. We usually recommend both herbs and acupuncture as well as nutritional and lifestyle modifications.

Top Recommendations for Hair Loss

  1. Get Regular Acupuncture – acupuncture nourishes the Qi and Blood and increases Qi and Blood flow to the scalp to stimulates hair regrowth.
  2. Get plenty of sleep – sleep is the time when yin and blood are most nourished in Chinese Medicine. Any issues of insomnia or poor sleep can ultimately cause more deficiency of blood and yin which affects hair. Focus on good sleep hygiene to allow for better rest.
  3. Check for deficiencies of vitamins and thyroid irregularities – simple bloodwork with your doctor can rule out medical reasons for the hair loss. Hormonal changes, anemia (low iron), low B12 are all common causes for hair loss, especially found in vegetarians or vegans. Biotin (vitamin B7) is found in protein rich foods like organ meats, eggs, fish, meat, seeds, nuts, and certain vegetables (such as sweet potatoes). High doses of biotin can affect thyroid numbers on labwork so be sure to talk with your doctor if you want to supplement with biotin. Be sure to eat enough foods rich in Omega -3 like salmon, walnuts, and flaxseeds as well. Silica can also
  4. Take Herbs Daily – there are a number of herbs and classic herbal formulas that have been used in Chinese Medicine for centuries to prevent hair loss.
        • He Shou Wu (Polygonium Multiflorum) – this herb, also known as Fo-Ti, is translated from Chinese to English as “The Black Haired Mr. He” meaning it prevents premature gray hair. It is used as a blood tonic and is recommended for almost everyone experiencing hair loss, no matter the reason.
        • Qi Bao Mei Ran Wan this traditional Chinese Medicine formula is a wonderful blend of herbs for supporting the hair.  It’s translation is “Seven Treasures for Beautiful Hair”. This formula is not a quick fix as it takes a while to build up your blood. Plan to commit to at least 3 months of this herb in order to really see the benefits. One bottle should last 7-10 days taken 3x/day.
        • Texas Medicinals Herbal Iron Syrup this iron-rich syrup is formulated with mineralizing herbs to support the body (see the recommended teas below).
        • Floradix Iron + Herbs – This liquid iron supplement is easy on the stomach and full of mineral rich herbs to boost iron levels. It is easy to find at grocery stores in town or go to my online pharmacy to order.
        • Yina Lumidrops Collagen Gummies – these gummies contain Chinese herbs to support the kidneys and liver with vitamin C, lycopene, biotin, and free-range, grass-fed bovine collagen to help strengthen hair, improve skin elasticity, and promote energy.

          pearls next to pearl power in container by Root and Bones

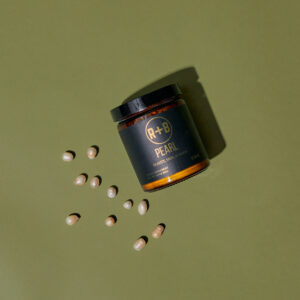
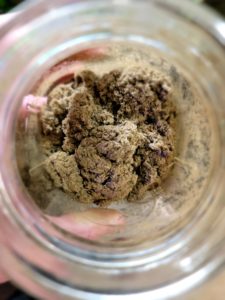
          Pearl powder by Root and Bones

        • Pearl Powder by Root and Bonespearl powder promotes healthy, glowing skin, and accelerate cell regeneration. It is rich in calcium, zinc, amino acids and antioxidants like glutathione and SOD. It supports healthy collagen production and defends against oxidative stress.
        • Marine Collagen by Root and Bones this ultra-absorbable blend of Type I, II, III & IV collagen is sourced from wild-caught deep-sea fish (cod, pollock, haddock) for maximum potency and bioavailability. Rich in amino acids that support skin elasticity, joint health, and connective tissue regeneration. 

          It also contains pearl powder, tremella mushroom extract and bamboo silica.  Pearl powder is a natural source of calcium, magnesium, and over 30 trace minerals. Tremella mushroom extract hydrates the skin and support elasticity. Bamboo silica encourages collagen synthesis and promotes strong, healthy hair growth.

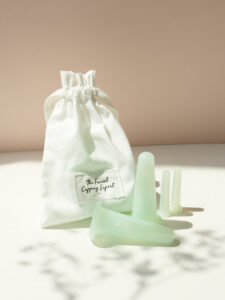
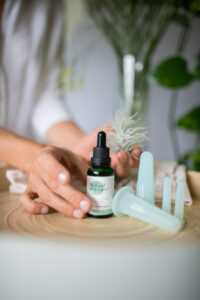
  5. Do scalp massages regularly with hair oil – a daily scalp massage helps stimulate the scalp to encourage hair regrowth. I love using my gua sha tool (with the comb side). Gently wiggle it back and forth over the scalp for 5 minute in the morning and evening. For even better results, massage oil into scalp and then brush it through your hair. Leave it overnight (protect your linen because the herbs will easily stain sheets!) or at least 4 hours. Use 1x/week. My favorite hair oils are:

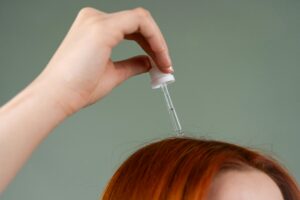
    Using the scalp oil on hair. 📸: @thefullonmonet

        • Banyan Botanical Hair Oil – this oil contains sesame seed oil, coconut oil with ayurvedic herbs like bhringaraj (known as the “King Of Hair”, cabbage rose flower, hibiscus, gotu kola, and amla fruit. Massage oil into scalp and then brush it through your hair. Leave it overnight (protect linen because the herbs will stain sheets) or at least 4 hours. Use 1x/week. 
        •  Banyan Hair Serum – this serum combines lightweight oils with rosemary and lavender for more frequent use than the hair oil above. Use daily to promote healthy hair growth, nourish the scalp, and lock in moisture.
        • Manetain Ayurvedic Hair Oil –  this wonderful hair oil is made by a local herbalist. It contains bhringaraj and amalaki as well as nettle and oat straw. Similar to other hair oils, it’s best as a once a week treatment.
        • Hair Therapy Oil – this oil is made by Jamila at her nearby salon, Jamila’s Salon. She doesn’t do online sales anymore but you can contact her to pick up.
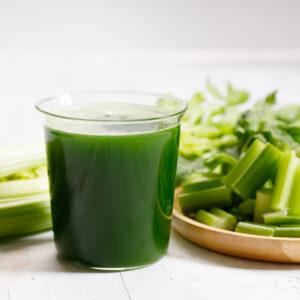
  6. Drink herbal teas regularly to nourish blood teas can supplement the diet with added minerals to nourish the blood.
        • Nettle tea – contains essential minerals like zinc, magnesium, iron, and silica which are helpful for follicle health and keratin production. Nettle also contains vitamins A, C, and K, antioxidants and fatty acids to strengthen hair. Steep nettle for 10 minutes to extract the minerals.
        • Red raspberry leaf tea – not for use when pregnant or breastfeeding. It contains antioxidants like vitamin A and  vitamin C, calcium, and magnesium to strengthen hair follicles and prevent damage.
  7. Add more fruit, berries, and seeds to your diet 
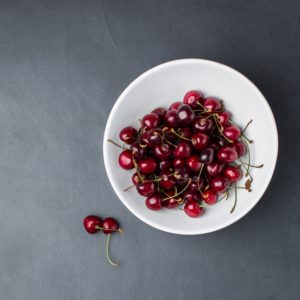
        • Goji Berries and Mulberries – tonifies the liver and kidneys in Chinese Medicine and nourishes blood. Also helps with dry eyes and eye health.

          dried mulberries in a white ceramic bowl

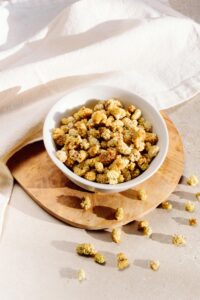
          Dried mulberries 📸: Antoni Shkraba Studio

        • Apple, apricot, avocado, date, fig, grape, and longan – these fruits are all helpful to nourish blood in TCM.
        • Sesame seeds, flaxseeds, and pumpkin seeds – these seeds provide zinc, magnesium, and fatty acids to aid in healthy hormone production.
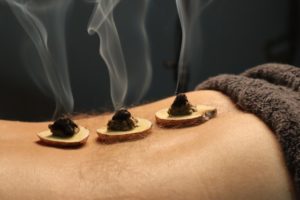
  8.  Try microneedling – microneedling can help with hair loss by stimulating follicles. It also increases absorption of skincare products by 2000%. Because of this increased absorption,  herbal topicals for hair growth that contain Chinese herbs like He Shou Wu and apple stem cells are even more effective after the microneedling. Schedule an acupuncture + add on microneedling session for hair loss if you are curious to try it out.


There are many ways to address hair loss from both an external and internal perspective through the lens of Chinese Medicine. Obviously, everyone is unique and will not require all of these suggestions above. If you would like to schedule a consultation to receive more specifics, please schedule an acupuncture consultation.

Disclosure: Some of the links on this page are affiliate links. We may get a small commission when you purchase them. The cool thing? It doesn’t cost you a penny and supports our business as well as the small businesses that we use ourselves and love! 

Facial Cupping: Benefits and Instructions for Your Home Facials

This entry was posted in Health / Wellness on by .

What is facial cupping?2 large facial cups + 2 small facial cups with a pouch from the Facial Cupping Expert

Facial cupping is a type of Eastern Medicine therapy in which small silicone cups are attached to the surface of the face to create a gentle suction with continuous movement. Unlike body cupping, there are no cupping marks left behind. In the eye area, the eye tissue is too delicate for sliding cupping so we use a technique called octopus kisses in which we apply suction to the cup for a second and then release the suction. Then move the cup to another area nearby and repeat. Both of these techniques are subtle and should not leave any marks like body cupping.

What are the benefits of facial cupping?

Facial cupping has many amazing benefits but here are a few that will encourage you to get your own facial cupping set today!

  1. Increases blood flow and circulation –  cupping immediately increases blood flow creating a glow to the skin and also promotes the formation of new blood vessels which deliver more nutrients to the skin.
  2. Boosts collagen production – cupping stimulates collagen and fibroblasts which helps improve skin elasticity for firmer skin.
  3. Relieves muscle tension – many people do not realize how much tension we carry in our faces, especially in the jaw and the temple areas. Cupping can help relieve tension headaches and TMJ pain.
  4. Supports lymph function/reduces puffiness – the suction from the cups encourages and stimulates the lymphatic system to move fluid through the body thereby reducing excess fluid and puffiness. This naturally creates more definition in the cheekbones and jawline.

Where do I get a facial cupping set?

Schedule a session for facial cupping to experience a treatment and buy your own facial cupping set before you leave the office or click here to order online from The Facial Cupping Expert store where I was trained and certified.

There are so many types of facial cups on the market these days. I have a whole drawer full of ones I have tried 😝

I have finally found my favorite ones from @thefacialcuppingexpert. They are soft and super flexible. The flexibility means that when I squeeze them, my hands don’t have to work very hard. For anyone, like me, who uses their hands all day or has any kind of arthritis, these are the ones to use.

They are also non-toxic and odorless – contain no BPA, latex, lead, or phthalates. The skin is our largest and most permeable organ so we want to keep our tools as clean as possible – just like our skincare!

How do I use these Facial Cups?

I usually spend some time going over some basic techniques during your first facial cupping treatment so you can do your own treatments at home (which I highly recommend!). But it is still nice to have a little bit of a routine written down for you to reference so that you feel more confident in your techniques. After all, the benefits of facial cupping are compounded over time!

But first, a few basic rules:
  1.  Always use oil – oil helps the cups glide and will prevent marks/bruises.
  2. Always keep the cups moving – again, this will prevent too strong of suction which causes marks/bruises.
  3. Less is more – aim to do facial cupping ~3x/week. I know people get excited for results and want to do it everyday but your skin needs time to recover, especially as we age. For people like me who struggle to get to bed at a decent time already, I often focus on one small area (just eyes or chin) a few times a week and then do a full face routine maybe 3x/month. Not ideal but life is full!
  4. Always clean your cups after every use – using warm water and soap will clean the cups without damaging them with harsh abrasives. You may need a little pipe cleaner brush or a Q tip to clean the tiny cup.
  5. Do not cup over areas of inflammation/redness – this means irritated or red skin, broken blood vessels, sunburn, cystic acne, breakouts, sunburn, open wounds, itchy rashes, etc.
Ok, now for the basic routine:
  1. Prepare the skin – after cleaning the face, neck and chest, apply a generous amount of facial oil to the face, neck and chest. There are so many wonderful oils to use so I encourage you to experiment to see which one you prefer. I will write another blog post on oils (I am always trying new ones!) but in my clinic, I mainly use these 3 oils:
      • Prickly Pear Oil – it’s simple, pure and is exceptionally rich in unsaturated fatty acids, particularly linoleic acid, to benefit all skin types.
      • TOMA Sculpting Treatment Oil – this oil is rich in fatty acids to hydrate and calm the skin thanks to this powerhouse blend of grapeseed oil, avocado oil, macadamia nut oil, jojoba oil, and tamanu oil.
      • Apothecary Company CoQ10 + Jasmine Intense Hydration Facial Oil – this ultra-hydrating botanical oil is infused with powerful antioxidants and the delicate scent of jasmine and rose essential oils.Facial Cupping Set and Prickly pear Oil
  2. Start with lymphatic drainage – With the large cup, do flash cupping (flash cupping = creating suction on a spot and then immediately releasing it, also called “octopus kisses”) on the sternum 3x, then down the neck, repeating 3x on each side, followed by under the chin, repeating 3x.
  3. Begin sculpting and lifting on the lower face – With the large cup, do sliding cupping (sliding cupping = creating the suction and then sliding from one point to another) under the jawbone from the chin to the ear, repeat 3x, then from the corner of the mouth to the ear, repeat 3x, then from the cheekbone to the ear, repeat 3x. Repeat on the other side. Do flash cupping in the area of the crow’s feet, repeat 3x on each side.
  4. Continue sculpting and lifting on the forehead – Using the large cup, do sliding cupping from the eyebrow lines (or the “11’s”) up to the top of the forehead, repeat along the entire forehead 3x (or less if redness occurs). Do sliding cupping with the smaller cup over the eyebrow lines (essentially tracing the wrinkles).
  5. Lift and open the eyes – With the small cup, do flash cupping (“octopus kisses”) along the orbital bone (the bone under the eye/top of cheekbone) from the inside of the eye to the outside of each eye, repeat 3x. Continue the flash cupping underneath the brow bone from the inside to the outside of the eye, repeat 3x on each side. Be careful in this area, the skin here is very delicate but it is especially helpful for a dropping eyelid.
  6. Plump the lips – With the small cup, do the octopus kisses around the lips 3x and then repeat with sliding cupping around and even on the lips. Be sure to apply more oil if needed.
  7. Focus on fine lines and wrinkles – Do flash cupping followed by sliding cupping over any areas of deep wrinkles or lines such as laugh lines or worry lines on the forehead or from the nose to the mouth). Be careful not to overwork an area – a little goes a long way.
  8. Finish with lymph drainage – Because this routine moves fluid from the face, finish with a few strokes to assist the lymph system. Using the large cup, do flash cupping under the chin 3x and on the sternum 3x. I love finishing with a jade roller or a hydrating mist

I hope you enjoy this relaxing nighttime ritual!

If you are still curious about cupping, schedule a combination session of Acupuncture + Facial Cupping or book your AcuGlow™️ treatment today!


Microneedling Explained

This entry was posted in Health / Wellness on by .

Rachel provides microneedling on a patient
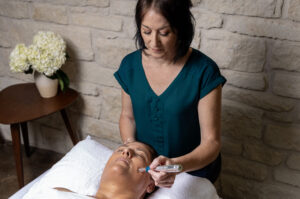
Holistic microneedling, also known as collagen induction therapy, is a minimally invasive procedure that involves a small pen with 12 tiny, sterile needles passed over the skin to create micro-injuries in the skin’s surface to treat fine lines, wrinkles, acne scars. With minimal downtime and a series of sessions only needing to be performed once per month, this is the perfect natural, non-toxic treatment for busy people.

Microneedling helps to promote collagen growth to improve skin texture and enhances the absorption of skincare products up to 2000%, which is why clean products are crucial with this procedure. It can also promote hair growth on the scalp and reduce acne scars on the face.

A holistic microneedling treatment includes body acupuncture to address the root cause of your concerns and provide an extra level of relaxation.

Recommended Frequency:

Depending on your goals, microneedling works best in 3-6 sessions for lasting results. Each follow up session is scheduled 4-6 weeks apart. For maintenance, schedule tune up visits every 6 months or other issues can be addressed with another series of treatments.

Aftercare:

  • Redness occurs for 8-12 hours after a treatment – 100% pure aloe vera can help reduce the redness.
  • No exercise the day of the treatment as sweating can irritate the face.
  • No make up the day of the treatment
  • Avoid sun – use mineral sunscreen for a week post-microneedling
  • Wash face with only warm water (no products)
  • Go back to regular facial routine the day after the treatment.
  • Avoid retinol, vitamin C serums, glycolic acid or alpha hydroxy acids (AHAs) for at least a week after treatment.

We do not recommend microneedling if you currently:

  • Have had a facelift, filler, or botox injections within the past 6 months
  • Have used retinol, vitamin C serums, glycolic acid or alpha hydroxy acids (AHAs) within the past week.
  • Take blood thinners
  • Receive chemotherapy or radiation
  • Have moderate to severe skin conditions (psoriasis, rosacea, eczema, active infection, warts, active herpes outbreak)
  • Have keloids
  • Are pregnant

Foods to Stay Hydrated and Cool during the Summer

This entry was posted in Health / Wellness on by .


As the temperatures hit over 100* this week, it’s important to stay hydrated so our body’s systems work optimally. Everyone knows the importance of drinking plenty of water during the summer.  We often forget how food can affect our hydration levels too.

Spicy Foods

Spicy foods are typically found in humid, hot climates of the world. The capsaicin in chili peppers causes us to sweat, thereby lowering our core body temperature. This can be helpful at times but too much spicy food can actually cause dehydration because it actually warms up our body first and then cools, depleting our yin, or fluids in the body. Eat spicy foods in moderation during the summer and increase foods that are more hydrating to preserve your body fluids.

Hydrating and Cooling Foods

Foods that are more cooling in nature provide the body with moisture to hydrate the body to keep the body temperature lower. Most people inherently reach for herbs like mint, basil, and dill in the summer which are more cooling in nature. Foods like pineapple, watermelon, and raspberries are also more hydrating.  Adding cucumber to water or having hibiscus mint tea are wonderful and refreshing ways to stay hydrated. Other foods to include this summer are leafy greens, avocados, celery, jicama, radishes, daikon, tomatoes, berries and figs.

One of my favorite summer salads is this Jicama, Radish, and Pepita Salad. If you are one of those cilantro haters (so sad!), you can replace the cilantro with mint and/or basil and it’s still delicious!

Electrolytes

What are electrolytes?

Electrolytes are minerals in your body that carry a negative charge which helps balance water and fluids in your body. If you have ever had muscle cramps, your doctor may have recommended some potassium. I recommend magnesium to everyone for muscle cramps and tightness. These are examples of common electrolytes.

Electrolyte drinks

Electrolyte drinks like Gatorade that are easy to drink to replenish minerals loss from sweating. They can be very helpful in the summer. As we age, it’s also difficult to stay hydrated so if you don’t use electrolytes regularly, summer may be a good time to try. Unfortunately, electrolytes can be full of sugar (or lately stevia or other types of sweeteners) so be careful if you have glucose issues. Coconut water can also be a very good natural electrolyte or you can make your own using coconut water. I have tried a lot of different electrolytes and prefer these Keto drops without any sugar or sweeteners. I also love the electrolytes from Pique Life which does contain monkfruit as a sweetener but it’s light and citrusy without the stevia aftertaste. It’s marketed as a beauty tonic but I like the tiny, individual packages that I can bring with me when traveling or anywhere on the go.

May you stay cool and hydrated this summer! ☀️💦

celery juice with celery in the background

Celery Juice

Moxibustion: The Benefits of Moxa

This entry was posted in Health / Wellness and tagged , on by .

What is moxibustion?

Moxibustion is a form of heat therapy that has been used for hundreds of years in Chinese Medicine. It is an integral part of Chinese Medicine. In fact, the Chinese term zhen jiu, which in English is translated to acupuncture, actually refers to acupuncture and moxibustion. Zhen means to puncture the body with a needle and Jiu means to use fire to heat acupuncture points.

moxa cones on ginger

Photo by Chinese Medicine Podcast Podcast from Pexels

Moxibustion is the process of burning the dried leaves of an herb called mugwort (also called Artemesia vulgaris, Ai Ye or Folium artemisiae). It produces a strong heat that penetrates deeply into the muscles and joints. It can be applied directly to the body on various acupuncture points or indirectly. The indirect method most commonly used is a moxa stick. A moxa stick is a large cigar of rolled mugwort that is lit and held a few inches above the skin. Other direct methods shape the moxa into the shape of a cone or a grain of rice. Like in the photo above, it can also be placed on a slice of ginger which is then placed on the body.

How does moxibustion work?

The warmth from the moxa penetrates deep into the body to warm and move Qi and blood. It increases circulation and blood flow to the body. In spite of the heat, it is very useful for reducing inflammation.

What does moxa treat?

It is wonderful for a number of conditions:

  • joint pain
  • menstrual cramps
  • digestive issues such as IBS and diverticulitis
  • immunity and allergies
  • fatigue
  • gynecological and fertility conditions
  • turning a breech baby

Is moxa good for everyone? 

Unfortunately, the smell of moxa can be very strong, even with smokeless moxa. It may not be appropriate for people who are sensitive to smoke. Although it can be used for allergies to open up sinuses, it may make some allergies worse. The smell is unique but can often be confused with marijuana. Most people in my clinic find the smell pleasant and calming. Even those with allergies can tolerate it briefly with the right ventilation and air purifiers.

Endometriosis: Six Ways to Reduce Pain and Inflammation

This entry was posted in Health / Wellness and tagged , , , on by .

Endometriosis is an often painful condition where the tissue that normally lines the uterus grows outside of the uterus. This endometrial lining can be found almost anywhere in the pelvic area and responds to hormones cyclically just like it would in the uterus. When the tissue is in the uterus, it is eliminated by the body during the menstrual cycle. For the endometrial tissue that is in other parts of the body, it breaks down but cannot be excreted from the body. This creates a cycle of chronic inflammation and the formation of scar tissue. These adhesions may block the fallopian tubes and contribute to fertility issues. Chronic inflammation produces an immune response causing a lack of response to progesterone during the luteal phase which can also affect fertility.

Symptoms of endometriosis may include:

  • Painful periods
  • Heavy or abnormal menstrual flow
  • Painful urination/bowel movements during period
  • Infertility
  • Back pain during menstruation
  • Pain during intercourse
  • Diarrhea, constipation or other digestive issues

Six Ways to Reduce Endometriosis Pain and Inflammation

  • Get acupuncture –  Chinese medicine considers endometriosis a condition primarily of hormone imbalances and lack of blood flow (or blood stagnation). Acupuncture can help reduce inflammation, improve blood flow, and regulate hormones. Herbs and supplements help with hormone regulation at different times during the cycle. Because endometrial tissue responds to the same hormonal changes that trigger your period to start, it’s important that the treatment plan and herbs adapt with this cycle.
  • Eat foods that increase blood flow and circulation – one to two days before the menstrual cycle starts (or whenever you start to feel pain or cramping), focus on moving blood and increasing blood flow. This will reduce cramping and pain and make the menses flow more smoothly without clots. If you are think you may be pregnant, avoid blood moving foods until you start your menses. Here are a list of foods to help increase circulation:  
    • shallots
    • scallions
    • chives
    • leeks
    • ginger
    • cayenne
    • spices like cumin, cardamom, dill, rosemary, oregano, nutmeg
    • watercress
    • horseradish
    • sour cherries
    • plums
    • cauliflower
    • broccoli
    • brussel sprouts
    • beet
    • cabbage
  • Warm the abdomen to increase blood flow and reduce cramps 
    • Frankincense and myrrh essential oils move stagnation. Place a few drops of each and mix into a carrier lotion or oil and rub the stomach in a clockwise motion, lifting up on the right side of the body and down on the left side of the body.
    • A castor oil pack can also help soften adhesions and reduce pain from cramping. Roll the castor oil on your stomach and then place an old flannel pillowcase or t-shirt over your stomach that you are willing to stain. Apply a heating pad for 15 minutes.moxa in jar
    • Moxibustion is also wonderful to increase circulation and blood flow. Moxibustion is a form of heat therapy in which dried mugwort (Artemesia argyi or A. vulgaris) is burned on or near acupuncture points. The warmth from the moxa warm and move Qi in the body. See a licensed acupuncturist to teach you how to use moxa at home!
    • Arvigo Mayan Abdominal Massage – this is a specific manual therapy technique used to help align the organs of the pelvic cavity and reduce adhesions. It can help regulate cycles, reduce painful cramps, and improve fertility.
  • Add supplements to your diet
    • N-acetyl-cysteine (NAC) is an amino acid precursor to glutathione, an antioxidant. It reduces circulating testosterone and insulin, as well as cholesterol. It decreases abnormal cell growth and inflammation. Some multivitamins contain NAC or buy a specific supplement like Nutrient 950 with NAC by Pure Encapsulation. Take at least 600mg/day for at least 3 months.
    • Fish oils – Omega-3 fatty acids are helpful in reducing overall inflammation in the body as well as pain reduction.
    • Vitamin D – Vitamin D reduces inflammation in the body and is crucial for proper immune system functioning.
  • Reduce/Eliminate Endocrine-Disrupting Chemicals (Xenoestrogens) There are many chemicals in our environment today that affect our endocrine system. For women with endometriosis, xenoestrogens can be particularly problematic. These chemicals mimic estrogen in the body and can block the real estrogen from doing its work. Xenoestrogens are a prime cause of hormone imbalance. Dioxins are toxic chemicals created as by-products of many industrial processes. They have been linked to an increased risk of endometriosis and irregular menstrual cycles. They are found mainly in the fatty tissue of animals. Be sure to buy organic and low fat as much as possible and limit consumption of beef, dairy products, and eggs . Other chemicals that can disrupt the endocrine are:
    • Nicotine
    • BPA (in plastics)
    • Phthalates (in plastics)
    • Triclocarbans (in antimicrobial soap)
  • Eat an anti-inflammatory diet – reducing the inflammation associated with endometriosis is crucial for reducing pain and other symptoms.
    • Fish Oils
    • Curcumin
    • Bromelain
    • Quercetin
    • Increase fruits and vegetables and reduce red meats, dairy, gluten, and poultry

Be patient as you make some of these changes! It can take 3-6 months for noticeable shifts in hormones and your menstrual cycles. It can take up to a year for big improvements with endometriosis. Get the support you need to be persistent. It takes time but you can reduce the symptoms of endometriosis.

10 Foods to Reduce Inflammation

This entry was posted in Food, Health / Wellness and tagged , on by .

cherries in a bowl

Inflammation is a healthy, normal part of the body’s mechanisms to heal tissue & protect itself. It is the immune system’s response to trauma and infections. If we eliminated all inflammation, we would no longer have the protection we need to heal our bodies. In an acute injury or infection, the nervous system regulates the immune system to keep the inflammatory markers in balance. If this balance is off, it can lead to allergic reactions, autoimmune disorders, and chronic pain. Most chronic diseases, like heart disease, arthritis, cancer, depression, and Alzheimer’s, are linked to chronic inflammation. It’s important to support the body with the right nutrients to lower stress, improve sleep, and strengthen immunity.

Inflammation from a Chinese Medicine Perspective

Inflammation is often thought of solely as a heat disorder because of the redness, swelling, and pain. While it is often treated as a heat disorder in Chinese Medicine, especially when acute, it isn’t always the primary issue.

Congestion and Stagnation of Qi and Blood

Chronic inflammation and stress can cause stagnation of qi and blood. “If there is free flow, there is no pain; if there is pain, there is lack of free flow” is a defining principle of Chinese Medicine. Eating foods that move qi and blood are essential to increasing circulation. This increased circulation provides the body with a fresh supply of blood in areas of inflammation and stagnation. Foods like pepper, eggplants, onions, garlic, ginger, and turmeric increase blood flow.

Cold Bi (Obstruction) Syndrome

Conditions like arthritis (called Bi (obstruction) Syndrome) may have a cold component. If the pain feels worse in cold weather, it is important to warm the body instead of clearing heat. Turmeric would be a great choice due to its anti-inflammatory properties. It is a very warming herb, however, that may not be great for everyone. It may be too warming to take everyday for red, swollen joints that get worse in the summer. Control the dosage to maximize the benefits without causing more heat in the body. Some people may take it daily during the winter months and reduce the dose or frequency during the hot, Texas summers.

Dampness

Dampness is another aspect of inflammation. For those experiencing water retention, bloating, swelling, nasal congestion and drainage, treatments in Chinese Medicine would focus on drying the damp. Humidity in our external environment and climate as well as the foods that we eat can affect the dampness in our bodies.  Allergies with mucus and phlegm and digestive disorders with loose stools and bloating are a great example of this type of inflammation.  Again, there may be a heat or cold component but it is crucial to target the dampness in the body as well. Celery and spirulina are great to drain damp and reduce swelling in the body. To provide a better balance, take these cooling foods with warmer spices like ginger or turmeric.

Yin Deficiency

In many chronic diseases, dehydration and lack of essential fatty acids can lead to yin deficiency. Yin is responsible for moistening and cooling the body. Deficiency of yin plays a huge role in continued inflammation. It is important to nourish yin by eating foods that are high in good fatty acids like omega 3s and gamma linoleic acid (GLA).  Evening primrose, black currant seed and hempseed contain GLA and foods such as salmon, mackerel, herring, sardines and tuna contain omega-3 fatty acids. Drinking half your body weight in ounces of water (for 150 lbs person, 75 oz or ~9.5 cups of water) is important for all body systems to function optimally.

In summary, inflammation is unique for every body. Choose the anti-inflammatory foods that work best for you and your condition. There are many food lists that list tomatoes as anti-inflammatory. Indeed, they have anti-inflammatory and antioxidant properties but are part of the nightshade family which contain alkaloids like glycoalkaloid solanine that have pro-inflammatory properties. Some people find their inflammation gets worse with nightshades and others don’t notice a difference. Experiment with these foods to see what works for you! But these are my top picks for the 10 foods to reduce inflammation:

  1. Cherries
  2. Pineapple (or Bromelain)
  3. Leafy Greens
  4. Blueberries
  5. Salmon
  6. Avocados
  7. Celery
  8. Spirulina
  9. Nettle Tea
  10. Turmeric


The Clean Fifteen and the Dirty Dozen: Should I Buy Organic or Conventional Foods?

This entry was posted in Health / Wellness on by .

Nearly 70 percent of the fresh produce sold in the US contains residues of potentially harmful chemical pesticides. Many of these pesticides remain on the fruits and vegetables even after being washed and peeled. To avoid these pesticides, people are choosing organic produce. Unfortunately, many of us cannot afford to pay the high prices of organic fruits and vegetables for all of our needs.

Thankfully, the Environmental Working Group (EWG) makes it easy for us to decide when to buy organic and when to choose conventional fruits and vegetables. Every year, they make a Shopper’s Guide based on tests by the U.S. Department of Agriculture.  It provides us with a way to reduce our exposure to pesticides while staying within our budget. The Clean Fifteen is a list of 15 fruits and vegetables that contain the fewest concentrations of pesticides while the Dirty Dozen is a list of 12 fruits and vegetables that contain the highest concentration of pesticides.

We can then choose organically grown produce where the pesticides are high (the Dirty Dozen) and choose conventionally grown produce where the pesticides tend to be low (the Clean Fifteen). So save money for a house like Tim Gurner suggests by buying those cheaper conventional avocados for your avocado smash toast!

The Clean Fifteen and the Dirty Dozen Lists from 2020

The Clean Fifteen

  1. Avocados
  2. Sweet Corn
  3. Pineapple
  4. Onions
  5. Papayas
  6. Sweet peas (frozen)
  7. Eggplants
  8. Asparagus
  9. Cauliflower
  10. Cantaloupes
  11. Broccoli
  12. Mushrooms
  13. Cabbage
  14. Honeydew melon
  15. Kiwi

The Dirty Dozen

  1. Strawberries
  2. Spinach
  3. Kale
  4. Nectarines
  5. Apples
  6. Grapes
  7. Peaches
  8. Cherries
  9. Pears
  10. Tomatoes
  11. Celery
  12. Potatoes

The full list of produce tested can be found here.


7 Exercises to Reduce Chronic Low Back Pain

This entry was posted in Health / Wellness and tagged , , on by .

Back pain is one of the most common reasons for missed work. Most people with low back pain recover only to have it return months later. Low back pain can be divided into two categories: acute or chronic. Acute low back pain is pain that comes on suddenly and lasts a few days to a few weeks. Chronic low back pain is defined as pain that lasts longer than 12 weeks, even after the initial injury or condition has been treated. Typically, acute low back pain is best treated with rest, ice/herbal topicals, and limiting activity. Chronic low back pain typically improves with exercises, stretches, and massage. The following list of exercises and stretches are predominantly for chronic low back pain and not recommended for acute back pain.

Chronic low back pain is often associated with weak core muscles, like the transverse abdominals (on the abdomen beneath the rectus abdominus) and multifidus (a deep muscle that runs along the spine in the lower back) and tight, tense muscles of the lower back and hips. Imbalances in muscle strength can contribute to poor posture, inflammation, and susceptibility to injury. Although there are a number of reasons for low back pain such as injury to muscles, ligaments, joints, or discs, strengthening the core muscles of the trunk can help protect from further injury. When there is an injury and/or inflammation in the low back, it may be felt through the entire lower body. The nerves that run from the lumbar spine innervate the muscles all the way down to the feet. The low back, or the lumbar spine, supports the weight of the upper body and allows us to bend and twist. The low back muscles allow us to flex and rotate the pelvis.Tight muscles prevent blood flow and circulation. causing limited range of motion. By increasing flexibility of the low back, blood flow and circulation provide fresh blood cells to reduce inflammation and decrease pain.

For disc injuries, however, such as herniations, loosening up muscles may cause more instability to the joints as the function of the muscles is to support and protect the spine. As a way to protect the joints and discs, the muscles get tighter and as they loosen, the joint must take on more of the support than it normally does. Be very cautious when doing exercises or stretches. Go gently and stop if there is any pain or discomfort.

Establish Neutral Spine

Neutral spine is crucial as a basis for all other exercises for the low back. It is also a way to explore the movement of the pelvis and the spine. When the pelvis moves forward and backward, the spine will follow.

  1. To find neutral spine, lie down on your back with your knees bent and your feet flat on the floor.
  2. Tilt your pelvis backward as far as you can go without pain and then release and return to the position where you started.
  3. Tilt your pelvis forward as far as you can go without pain and then release and return to the position where you started.
  4. Return to the center of those two positions where there is a gentle curve in your low back. This will be your neutral spine and the starting place for most of the following exercises.

Drawing In Maneuver

This is one of the most basic exercises to help support your low back and prepare for even more core stabilization exercises. Most people rely predominantly on the superficial muscles and have difficulty engaging deeper muscles of our core, causing instability of the joints and imbalances of the muscles.  Over time, the deeper muscles become weaker and the superficial muscles become extremely tight and overused. This exercise forces activation of the deepest spinal stabilizer muscles, the transverse abdominal muscle. It also encourages the multifidus muscle to contract along side the transverse abdominal muscle. The ability to contract these two muscles together is key for stabilizing the low back.

  1. Lie down on your back with your knees bent, feet flat on the floor, and pelvis in neutral spine.
  2. Breathe in with a deep inhale.
  3. While keeping your pelvis in neutral spine, exhale and pull the belly button in towards the spine, using your abdominal muscles. Now draw muscles from behind your pubic bone to your tail bone and the left and right pelvic bones together as you imagine zipping a zipper to draw the pelvic floor up. No movement of the hip, pelvis or spine should occur.
  4. Hold for 5 seconds.
  5. Inhale and repeat 5 more times.

Many of us will experience a new sensation with this exercise as we recruit the transverse abdominal muscles. Recruiting these muscles regularly will allow us to recruit them during the middle of day while we are standing, walking, or sitting thereby supporting our back in a profound way and alleviating pain.

Knee to Chest Stretches

This stretch helps lengthen the muscles of the lower back and relieve tension. Keep in mind that this is a passive stretch so you want to keep the legs and hips as relaxed as possible. Think about releasing the muscles rather than powering through this exercise.

  1. Lie down on your back with your knees bent, feet flat on the floor, and pelvis in neutral spine.
  2. While exhaling, draw in your abdominals muscles (see Drawing In Maneuver above) and use both hands to pull one knee up to the chest. Interlace your fingers just under the knee.
  3. Hold the knee against the chest for 5 seconds.
  4. Slowly lower the leg and repeat with the other leg.
  5.  Repeat 2-3x.
  6. If you would like to do both legs at the same time, bring one leg up and then the other. Hold for 5 seconds.

Low Back Rotational Stretches

This exercise can help release tension in lower back and into the hips. Be gentle as you go through this rotation. For disc issues, rotation can be a painful and difficult movement. Start gently and progress only as long as there is no pain.

  1. Lie back on the floor with bent knees and feet flat on the ground.
  2. Bring knees to the chest (as in the previous exercise) and then return the arms to the mat and extend the arms and keep shoulders firmly on the mat. Gently roll both bent knees over to one side, keeping the abdominal muscles engaged as you reach the ground. Modification: If rolling to the ground is difficult or causes any pain, wrap your arms around your knees and rotate only slightly without letting your knees reach the ground.
  3. Hold the position for 5–10 seconds.
  4. Return to the starting position.
  5. Gently roll the bent knees over to the opposite side, hold, and then return to the starting position.
  6. Repeat 2–3 times on each side.

Child’s Pose

This stretch is a very relaxing, gentle stretch to lengthen the spinal extensors muscles of the back. It constricts the diaphragm which encourages more movement in the back of the rib cage.

  1. Start in a crawling position on a mat.
  2. Then sit back onto bent legs, bringing your sits bones to your heels.
  3. Stretch out both arms out in front of you with your forehead resting gently on the mat. If you feel comfortable in this position, you can bring the arms down along your side with your palms face up. Some people will feel constricted in this position because the posterior rib cage is tight. Focus on breathing into the back of the rib cage and expanding the breath through the back.
  4. Round your back and tuck your tailbone.
  5. Breathe deeply for 5 breaths.

Small Hula Hips

This exercise helps you find the areas where there is the most tension. Go slowly and gently, observing where you feel any resistance and lingering longer in those areas.

  1. Stand with feet slightly wider than hip width apart. Keep knees slightly bent with your hands on your hips with neutral spine.
  2. Imagine you are drawing a small circle with the tip of your tailbone as you rotate your sacrum in one direction slowly. The hips and legs move very little as the focus is on the sacrum and tailbone.
  3. Switch directions.
  4. Repeat 5 times.

Large Hip Circles

  1. Stand with feet slightly wider than hip width apart. Keep knees slightly bent with your hands on your hips with neutral spine, engaging the abdominal muscles.
  2. Hold arms out to the side or on your hips. Extend the right hip all the way out to the right. And then all the way out to the left. Try to keep your upper body even without bouncing up and down.
  3. Now push the hips all the way forward and then all the way back. Keep your abdominals engaged and the head even without arching the back or lifting the chin.
  4. Combine all the 4 movements into one smooth movement.
  5. Move the hips to the right, then forward, then to the left, and then back. Repeat 4 times.
  6. Switch directions as you move the hips to the left, then forward, then to the right, and then back. Repeat 4 times.

Forearm Planks

The plank and side planks are some of the best exercises to build core strength and balance in deeper back muscles like the multifidus and quadratus lumborum muscles.

girl doing a plank

Photo by Li Sun

  1. Start in a crawling position on the mat.
  2. Place your forearms shoulder width apart on the floor with elbows below the shoulders and arms parallel to your body with your back in neutral position. If your wrists bother you, clasp your hands together in front of you. Gaze a bit in front of you, your nose should point towards the floor and neck parallel to the ground.
  3. Extend your right leg and then left leg back in the plank position, shoulder width apart on flexed toes. Keep your abdominals engaged with a neutral spine as you did in the Drawing In Maneuver above.
  4. Hold this position for 20-60 seconds. 
  5. Now rotate to the side with one leg stacked on top of the other. Prop your body up on your left elbow while keeping your feet stacked. Place the right arm on your hips. You can increase the difficulty by raising your right arm and/or propping your body onto your left hand instead of the elbow.
  6. Hold this position for 20-60 seconds.
  7. Repeat on the other side.
  8. Repeat both sides 5 times.  

It is not necessary to do all of these exercises every day. Pick just one or two to do every day for a week. You can add others if you have time. Abdominal muscles build up strength quickly – give it a week and let me know if you feel a difference!

Chinese Herbal Topicals to Relieve Pain and Inflammation from Soft Tissue Injury

This entry was posted in Health / Wellness on by .
Girl doing a karate kick in front of trees in a park

Photo by: Caleb Oquendo

From Kung Fu Medicine to Chinese Sports Medicine

Injury recovery has been a part of Chinese Medicine since the beginning of martial arts. Teachers with amazing fighting skills were also the very same teachers who had abilities to heal the sick and injured. Kung Fu Medicine evolved into Chinese Sports Medicine which combined acupuncture, herbs, moxabustion, massage, exercise and nutrition. Using the right treatment at the right time makes all the difference and plays a crucial role in preventing a minor injury from becoming a chronic injury. In order to understand the timing of the treatments, one must understand the stages of an injury.


The Three Stages of Injury

Stage 1

This stage starts at the moment of injury and generally last 1-7 days. There will be a combination of symptoms including swelling, bruising, inflammation and/or pain. Sometimes this stage only lasts a few days but for some, it can last for an entire week.

Stage 2

This stage starts within a week after the injury and can last up to 3 weeks. The swelling begins to settle, the heat and inflammation is greatly reduced, and the pain is improving. Stiffness and soreness increases. Symptoms often shift a lot during this time as inflammation comes and goes. The pain and stiffness fluctuates from day to day.

Stage 3

This stage starts around 3-4 weeks after the injury. The swelling and inflammation have dissipated but the stiffness and soreness increases. There is restricted range of motion. Ligaments and tendons take much longer to heal than muscles due to their limited blood supply. They make take up to 6-8 weeks to heal completely. In more severe sprains, it may take even longer. This is also the stage where injuries can linger and become chronic. The pain may continue to come and go with occasional swelling and inflammation.

Treatment Plans for the Three Stages of Injury

Stage 1

This is the only time that we recommend ice in Chinese Medicine. As the saying goes, “Ice is for dead people”. In Traditional Chinese Medicine, it’s important to maintain blood flow and circulation, especially in ligaments and tendons that have less blood supply than muscles. Using ice beyond the initial 24 hours of injury will further impede blood flow and cause the blood to stagnate. The lack of blood flow will further slow down the muscle recovery. The influx of blood brings the necessary white blood cells to heal the tissue. If ice is necessary due to high pain levels, alternate the ice with heat to continue supplying the injury with blood. It is a balancing act to reduce the pain by reducing inflammation while still keep the blood flow moving. There are acupuncture points to reduce heat and inflammation as well as herbs to use topically to clear heat without blocking the blood flow and reduce pain levels. NSAIDs can be a great tool to reduce inflammation but they are also known to interfere with muscle recovery.

Stage 2

During this stage, treatments can be more localized, focusing more on the site of injury instead of the area around it. As I mentioned previously, this stage brings a wide variation so the treatment plan may vary from week to week. On the days where inflammation is high, the focus is on reducing the swelling, heat, and inflammation. As the stiffness settles in, the treatment plan will include points to increase blood flow. This is also the time to use moxibustion as well as topicals which have more herbs to increase the circulation.

Stage 3

Treatment for this stage is focused on increasing poor local circulation and tonifying Qi and blood to aid in recovery. Wind, damp, and cold are elements in Chinese Medicine that can exacerbate symptoms and prevent proper healing. Applying topicals are still important during this phase but it may be more important to use internal herbs to address more systemic blood flow and nourishment to the connective tissue.

Topicals to use for Each Stage

Stage 1

A famous kung fu teacher known as “Magic Hands”, Hsu Hong-chi was treating an ankle sprain when his student Tom Bisio suggested using ice to help reduce the swelling. He responded with the statement, “Ice is for dead people.” *This story is taken from a wonderful book called A Tooth from the Tiger’s Mouth by Tom Bisio*. In Chinese Medicine, ice is used in the first 24 hours of an injury but after that, heat is preferred to increase blood flow and healing.


  • There is also a classic trauma liniment called Die Da Jiu, also known as Dit Da Jow, that has been used for centuries in martial arts. It is translated as “fall and hit wine” even though this wine is for external use only, never internally. It is a classic formula to strengthen sinews and relieves pain in muscles & joints. It’s great for aches and pains but especially good for any injury to muscles, joints, and bones. Liniments are easy to use by just applying directly onto the injured area. They are cleaner than a more oil based topical because they evaporate quickly due to the alcohol. The disadvantage of the evaporation is that they need to be applied often to be effective. There are many variations of this topical that I use in my clinic and at home:chinese herbal topical called Zheng Gu Shui
  • White Flower Oil is a combination of essential oils like eucalyptus, lavender, menthol, wintergreen, peppermint and camphor to help relieve pain and inflammation.


Stage 2

Treatment can be stronger and more direct. Applying wet heat, like hydrocollator packs and hot towels, and herbals soaks are now recommended to move stagnation in the tissues to help increase range of motion and movement. Herbal soaks are made by cooking herbs in a pot of water and placing the injured body part in the liquid after the herbs are removed. If the soft tissue injury is not an extremity, soak towels in the herbal soak and place or wrap the injured area.

  • My favorite herbal soak, created by one of my brilliant former professors, is available by prescription at AOMA herbal pharmacy. It is based on the formula Hai Tong Pi Tang. Please reach out to me for more information!
  • Dr. Bob’s Medicated Oil by Blue Poppy. This potent topical is a variation of the classic marital arts formula called Po Sum On. It’s a well-balanced massage oil to increase circulation, warm the muscles, and reduce inflammation and pain with the addition of peppermint oil. A little goes a long way. Add a few drops to a neutral massage lotion and apply to a large area or just use a drop on a cotton ball and apply to the affected area. 
  • Wu Yang Pain- Relieving Plasters  This plaster can be cut to fit the size of the injury and left on for several hours. It is also helpful for more chronic injuries in Stage 3 like tendonitis as well as sprains, strains, and torn or pulled muscles with swelling, heat and inflammation.

Stage 3

This chronic stage may require the use of topicals from Stage 1 and 2 depending on the level of inflammation and swelling. It is also a great time to use internal herbs. Moxa sticks are also great to help increase blood flow, especially for ligament injuries and joint pain where cold causes more pain and blood flow is typically less than in muscles.

In conclusion, the most important aspect of understanding these stages is to move through them properly in order to prevent acute injuries from becoming chronic. Inflammation causes pain but it is also the mechanism that brings healing to the tissues. The ideal is to have enough inflammation to bring healing to the tissues but not enough to cause pain. I have spent 20 years trying to improve upon that balance. May these topicals help you in whatever stage of healing you find yourself.